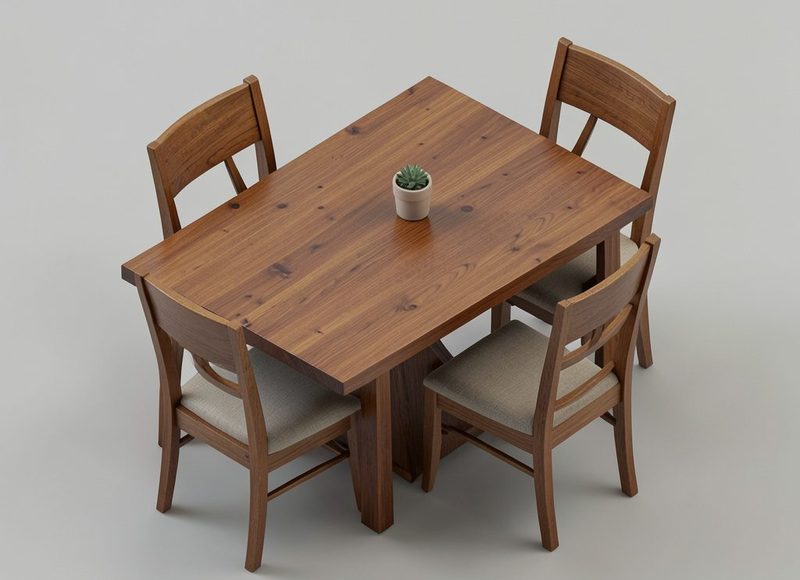



DIY chair upholstery: a beginner’s step-by-step guide
A tired dining chair can often be rescued with new fabric, fresh foam and a few careful hours. This guide focuses on a simple chair with fixed, lightly padded seat and back panels secured by staples or tacks.
Reupholstery becomes less intimidating when each stage has a clear purpose. Photograph the chair before touching it, label every part, and keep the old cover as a pattern; careful measurements prevent mistakes that turn a weekend project into a repair bill.
Work through the sequence from assessment to removal, cutting, sewing and refitting. Wear eye protection, keep fingers clear of tacks and blades, and allow extra time if the chair has unusual construction.
Plan the project and measure carefully
Decide what you want to achieve and inspect the chair honestly. Check for loose joints, splits, insect damage or broken fixings before buying materials. A sound timber frame is worth recovering; a failing frame may need a carpenter.
Measure the chair, detachable parts and route to the work area. Compact Sydney apartments can make narrow doorways the biggest obstacle, while Melbourne apartments can have equally tight lifts. Check clearances before dismantling anything.
Gather a measuring tape, screwdrivers, pliers, staple remover, staple gun, tack hammer, awl, scissors, strong thread and sewing machine, plus safety glasses and gloves. For a project spread over several evenings, a reliable time clock can help you record each session.
Understand the chair frame
Remove cushions and identify how the panels are fixed. Some covers wrap under a seat board and staple to the rails; others are tacked on or screwed in place. Photograph existing holes and marks, because they show where the original tension was balanced.
Before buying a second-hand chair, use a frame guide to assess its construction rather than relying on appearance alone. Sound joints, even wear and a flat, unstained seat base are encouraging signs, while soft timber, rusty fixings or a wobbly rail suggest a bigger repair.
Turn the chair over and check whether the seat board, back supports and legs move independently. Mark each connection with masking tape before removing screws. Keep every screw in a labelled container, as tiny fittings are easy to lose and hard to replace.
Strip the old upholstery safely
Take the chair apart in small, reversible steps. Photograph the seat from above and below, note which way the piping runs, and mark each section. Put pieces in the order they came off, especially helpful with symmetrical panels.
Lift staples with the correct remover, supporting the timber so it does not split, and pull remaining tacks with pliers. Save useful hardware, but wear gloves and eye protection. If the fabric feels brittle, work in controlled sections rather than tugging hard.
Remove the old foam after checking its condition and how it was cut. Keep sound padding if you can reuse it, but replace compressed or crumbling foam. Bag the debris and clean your hands and tools before handling new fabric.
Choose fabric, foam and supplies
Choose upholstery fabric by use as well as looks. A tightly woven or coated option suits a busy dining room, while a textured weave hides small marks. Pick batting that supports the foam without excessive bulk, and match foam thickness to the original seat profile.
Ask about lightfastness if the chair sits near a window, especially in Perth, where strong sunlight can fade colour quickly. In Brisbane’s humid climate, favour breathable backing and cleanable surfaces, and address any existing moisture or mould before recovering the chair.
Compare upholstery sold by the metre at Australian stores such as Bunnings or Mitre 10 and online suppliers. Check prices in Australian dollars, usable width, pattern repeat and delivery charges. Buy matching fabric from the same dye lot where possible, and allow 10 to 15 per cent extra for mistakes.
Cut and sew the replacement cover
Unpick the old cover and press its panels flat before using them as templates, then check them against your measurements. Place the old fabric right side down, smooth it, and trace around each piece. Add seam allowances where the original seams had them, label the grain and match direction, and mark darts or notches on the new cloth.
Cut on a large, flat surface with sharp scissors or a rotary cutter, keeping the fabric stable. Cut backrest pieces as a mirror pair and leave extra material at corners that will be rolled or tucked under. Use the selvedge as a straight guide if the original cover did.
Sew with a heavy-duty needle and strong thread, testing the stitch on scraps first. Join long seams, press them flat and reproduce original seam lines where useful. Leave an opening for fitting unless you are sewing a removable slipcover, and compare each piece with its old counterpart before trimming.
Fit the cover and rebuild the chair
Trim new foam to fit the seat cavity, wrap it in batting and place it on the board. Fit the cover before final trimming: stretch the fabric across the board, secure it at the centre of each rail, then work outwards. Keep tension even and staple into sound timber, checking underneath for protruding points.
Work around the base and sides with short, evenly spaced staples, then roll or tuck excess into neat corners. A second pass secures the last folds. Repeat on the backrest, using the old cover as a guide to its original height and angle.
Refit seat supports and tighten every screw before putting weight on the chair. A gentle side-to-side test should not move the frame; if it does, correct the loose joint rather than pulling the cover tighter. Vacuum the chair and inspect the underside for sharp edges.
Check the finish and plan maintenance
Let the chair rest for a few hours, then check the seams, tension and comfort again. Sit normally, stand up and look for marks or bulges. Small adjustments are easier now than after the new fabric has stretched through use.
Vacuum with a brush attachment and spot-clean only as the fabric label allows. Blot spills rather than rubbing, and avoid soaking foam without a protective lining. Keep the chair out of prolonged direct sun and away from heaters, which can dry fibres or distort adhesives.
Keep the old cover for a repair patch, then check your council’s bulky-waste rules before taking the stripped frame to a tip. Disposal times, fees and accepted materials vary, and some councils require a booking. If the chair is moving homes, measure the vehicle and doorways first.
Choose one straightforward chair, take clear photos and collect your tools before the first staple comes out. Treat assessment and measuring as part of the make, not as delays to sewing.
Save this sequence, select a suitable chair and begin with a careful measurement. Browse the site’s furniture and lighting galleries for visual inspiration as you plan your next project.